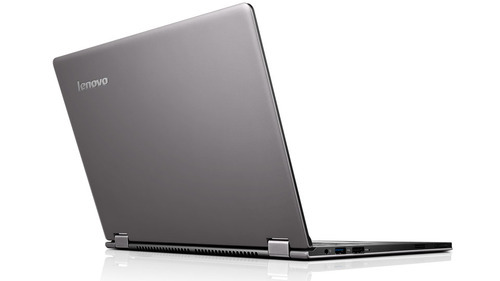
Installing Ubuntu Linux on a Lenovo Yoga 11s
If you’re looking for a Linux laptop, I’d highly recommend the Lenovo Yoga 11s.

I picked up mine at a local Best Buy for $799. Here are the specs:
- Intel Ivybridge Core i5 Processor (1.5GHz) x 4 cores
- 4GB RAM
- 128GB SSD
- 11.6-inch (1366p x 768p) touch screen
- Multi-touch trackpad
I’d say it’s a pretty good deal, given the specs and the relative ease of getting Linux installed. Also, Ubuntu is already starting to take advantage of touch screens. While it’s not perfect yet, I think in time features should be improved making this an even better Linux laptop.
The build quality of the Yoga 11s is nice. I’m usually not impressed the look and feel of non-Apple laptops. A lot of the ones I’ve tried feel cheap and flimsy. The Yoga is for the most part plastic, but it’s done really well.
Getting Linux Installed on your Yoga 11s
Don’t let UEFI scare you if you’re new to it (I was). All you have to do is disable secure boot by hitting F2 at boot. After that, it’s much easier. Here are the steps I took:
-
Resize your Windows partition by using the Disk Management tool in Windows. I halved it, so Windows and Linux are both using around 50GB.
-
Download an Ubuntu iso and copy it to a USB stick*. You’ll need to use an application to do this. Since the Yoga 11s comes with Windows, I used a program called Rufus. It’s free and available here: http://rufus.akeo.ie/
-
Reboot the Yoga and hold down F12 to get to the boot menu. You should see the USB stick as an option. Select that and it will boot up the Ubuntu installer.
-
The rest should be pretty straightforward. Just follow the Ubuntu installer.
*Note: make sure you use a USB stick and not an SHDC card. This laptop will not boot from an SDHC card. I found this out the hard way after many hours trying to get it to boot.
Once you have Ubuntu installed, it should have set up a bootloader for you. Ubuntu will be the default to load upon boot. If you want to get back to Windows, simply press F12 at boot.
Wireless Woes
Wireless does not work out of the box, unfortunately. Getting it set up is, yes, easy. Here’s how:
- Using a computer with an internet connection, download this file https://github.com/lwfinger/rtl8723au/archive/master.zip and put it on the USB stick you used for your Ubuntu install.
- Boot up Ubuntu and copy the zip file over. Unzip it and then open up a terminal.
cdin to the rtl8723au directory and then type:make- Once compiling is done, type:
make install - Reboot and then use the wifi icon in the system tray to select your network.
If this doesn’t work for you, try updating your kernel to 3.8 or 3.9.
Happy Linuxing!